3 rules for achieving the perfect ‘shelfie’
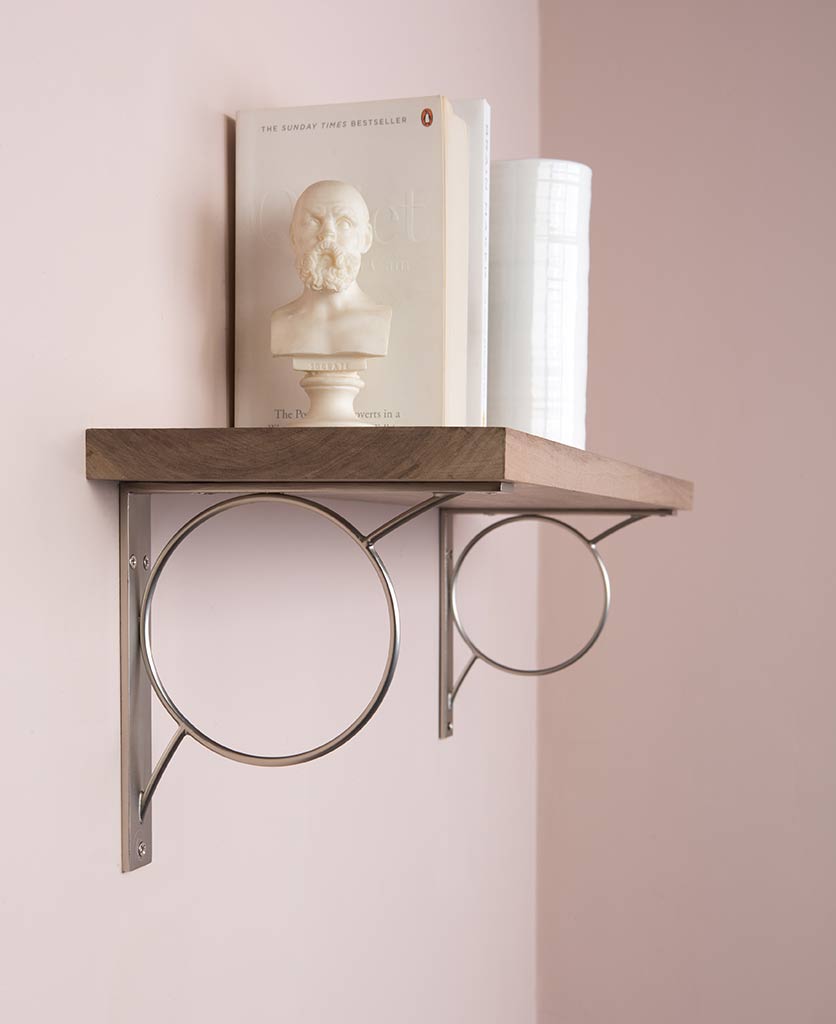
Here’s my quick guide to achieving the perfect ‘shelfie’. You can create a shelf photo worthy of any interiors Instagram feed by following three simple rules; good lighting, the right angle and beautiful styling. The starting points are the same for both achieving the perfect shelfie and the perfect selfie. However, the shelfie needs a little more TLC and a bit of prep behind it. As I found out, taking the perfect shelf shot is easier said than done!
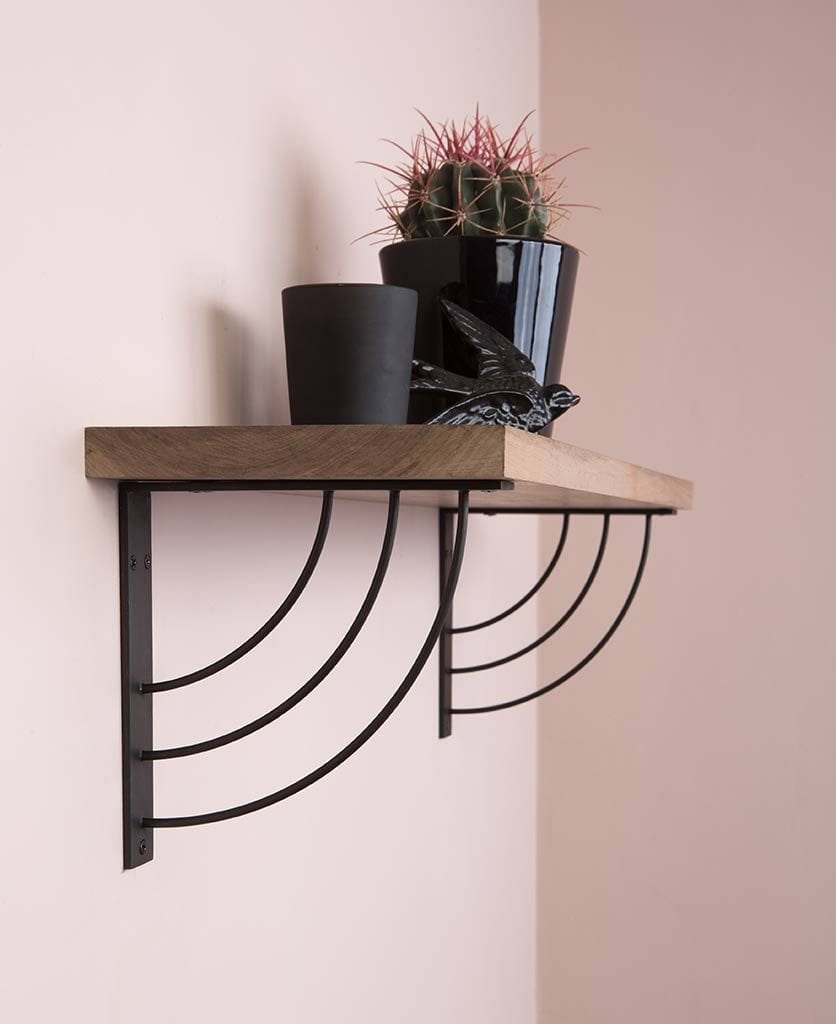
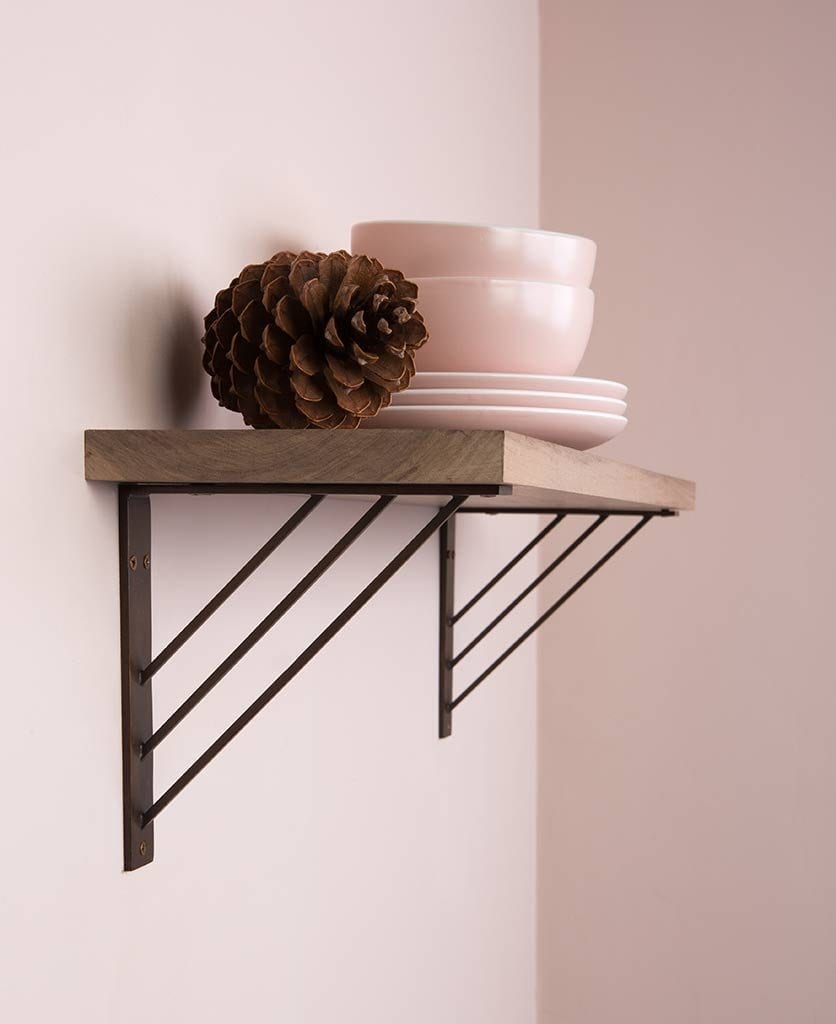
In this post, I’m going to go through how to achieve a mouthwatering shot like the one above. We’ve recently introduced a new range of shelf brackets so we’ve just been through this exact exercise!
Brackets are the obvious place to start when you’re creating your own wall-mounted shelves. Brackets are usually made in metal – it’s sturdy, strong and durable so makes sense! This photo features MAE in dull nickel brackets from our own range and we’ve used a beautiful piece of untreated wood as the shelf. Recreate this look in your lounge or home office to feature a couple of your favourite books and a tasteful ‘knick-knack’. A different kind of wall art.
Rule 1: good lighting
Our photographer, Lucy, advises making your lighting look as natural as possible. Now you may be fortunate enough to have your shelf near a window – the perfect source of natural light. However, take your photo on an overcast day, not a bright sunny one (otherwise diffuse the light with a curtain or blind). Direct sunlight can make your photo have bright highlights and very dark shadows which can make your picture look harsh. Not the eye-candy you’re after.
Rule two: right angle
Right as in correct, not right as opposed to left! Pick your angle carefully, this can literally make or break your shot. The number one rule is get above or below your subject. Anything taken at eye-level, or just above, will end up looking like an amateur snapshot. Brutal but true!
We chose to go low – we wanted to showcase the brackets after all. Adjust your camera position until you get ‘good lines’. That means look at how your brackets, shelf and objects are all interacting. You don’t want any ugly overlaps that make uncomfortable shapes. Space is just as important as the focus of your photo. Your eyes should flow around your picture.
Rule three: beautiful styling
You wouldn’t wear black shoes with a brown belt… Would you? Just like fashion, creating a good shelfie has basic styling rules too:
- First, figure out your base colour – black, white or grey are great neutrals to start with – this is likely your wall colour, in our picture above we’ve used a soft pink
- Then, decide on your accent – the colour that’s going to make your shelfie pop. Here we chose to go high-contrast with black but mixed a few different textural finishes, shapes and sizes to add interest
- Finally, styling. Choose your accessories carefully, you want to go for an odd number of items in differing heights, introduce different shapes to keep your composition interesting. This needs to be an arrangement of beautiful objects that you love to look at.
Keep your shelfie objects diverse
You could fill your shelf with books. However, to take your shelfie from lukewarm to smoking hot you need to work a bit harder than that! You need a few choice things that are actually interesting to look at. See the second two bullet points above. To get you started, hunt around your home for a small plant, candles, a photo from your last holiday, trinkets from your travels and other things that you just love to look at. Pick out more things than you think you’ll need – arranging the perfect shelf takes some trial and error.
Play with height
Having everything the same height on your shelf is the fastest way to ensure your shelfie falls flat. Height difference is the key to creating a visually appealing balance. Have something low-level at the nearest end of your shelf if you’re going for an angle similar to our shots, then something taller in the middle and then either taller again or, ideally lower and squatter at the far end. If you’re going for a front-on shot, then layering is going to be key to creating dimension and therefor interest. Have a play to see what works best. Your shelfie will thank you.
The last thing to do
So you’ve styled your shelf and you’re about to take ‘the shot’… Pause for a second to appraise your composition and take the advice of Coco Chanel… “Before you leave the house, look in the mirror and take at least one thing off.” We strictly abide by this ‘taking one thing off’ rule in all our photoshoots!
Check out more shelfie inspiration here on Instagram.
We’d love to see how you style your shelfies using our gorgeous new brackets. Do tag us in your pictures and use our hashtag #dowsingandreynolds. We love a good nosy around your feeds.

